Showing posts with label Yum. Show all posts

Friday, May 03, 2013

Recipe 4: Croissants

Labour of love doesn't quite cover it.

I scoured the internet for recipes after being overwhelmed with the desire to make croissants.  Why?  I've no idea.  But I had to make them.  And even after looking at recipes with ever-mounting trepidation, I bit the bullet and attempted a very long (but ultimately worthwhile) process, and I made croissants.

I used this recipe from Cannella Vita, because it had gifs and lots of pictures and the after photos looked delicious ^_^ Simple things!

Truly, the actual process of making croissants takes a while.  You make the dough and chill it overnight.  Then you roll it out, add the butter, chill.  Roll and chill.  Roll and chill.  It's an excellent arm workout and it had me clock-watching like crazy.  In a way, it's kind of therapeutic.  And in another way, when you're rolling out your chilled butter and dough mixture for the nine-millionth time, you wish you'd never started.


And then you see them all rolled up and cute and miraculously looking like croissants and you get excited.


And then you bake them and sure, they don't exactly bake evenly (for that, I'm tempted to blame the oven) but they look like croissants -and- they smell like croissants.


And then you eat them, with a cup of coffee and a spoonful of orange curd (or whatever takes your fancy!), still in your dressing gown on a bright Saturday morning and you think to yourself - That was totally worth the effort.

Time consuming, yes.  Consumed in no time, double yes.  They tasted great, they were a little more doughy than flakey and they were just as nice cold as when they were warm.  I'm really glad I gave these a shot, though I'm not sure how many more times I'll be labouring over croissants in the future!

I hope you've got lots of wonderful things planned for your weekend ^_^ Thank you for stopping by!

xoxo

Saturday, April 20, 2013

It's Beginning To Feel Like Spring.

I am eternally grateful for the change in season; I look forward to it every year, desperately waiting for the morning I pull myself out of bed at 5 and see the sunlight, knowing I can walk to work without it being bitterly cold and dark.  It cheers me up no end, especially since I'm not terribly fond of my job ^_^

We've been having to take extra good care of Whiteface, since he unfortunately developed an infection where his leg was removed.  He is now sad cat, wearing a cone and taking lots of antibiotics.  He's eating and drinking and pottering about though, recovering slowly.  Poor mite!

I'm excited about spring.  It brings out a creative spark in me, like a whole new beginning for a new year (even though I know that started four months ago!) and this year I have been indulging in pretty colours and baking.  I really, really have caught the baking bug (which is helping out with my 12 new recipes challenge) and am, most days, up to my elbows in flour.


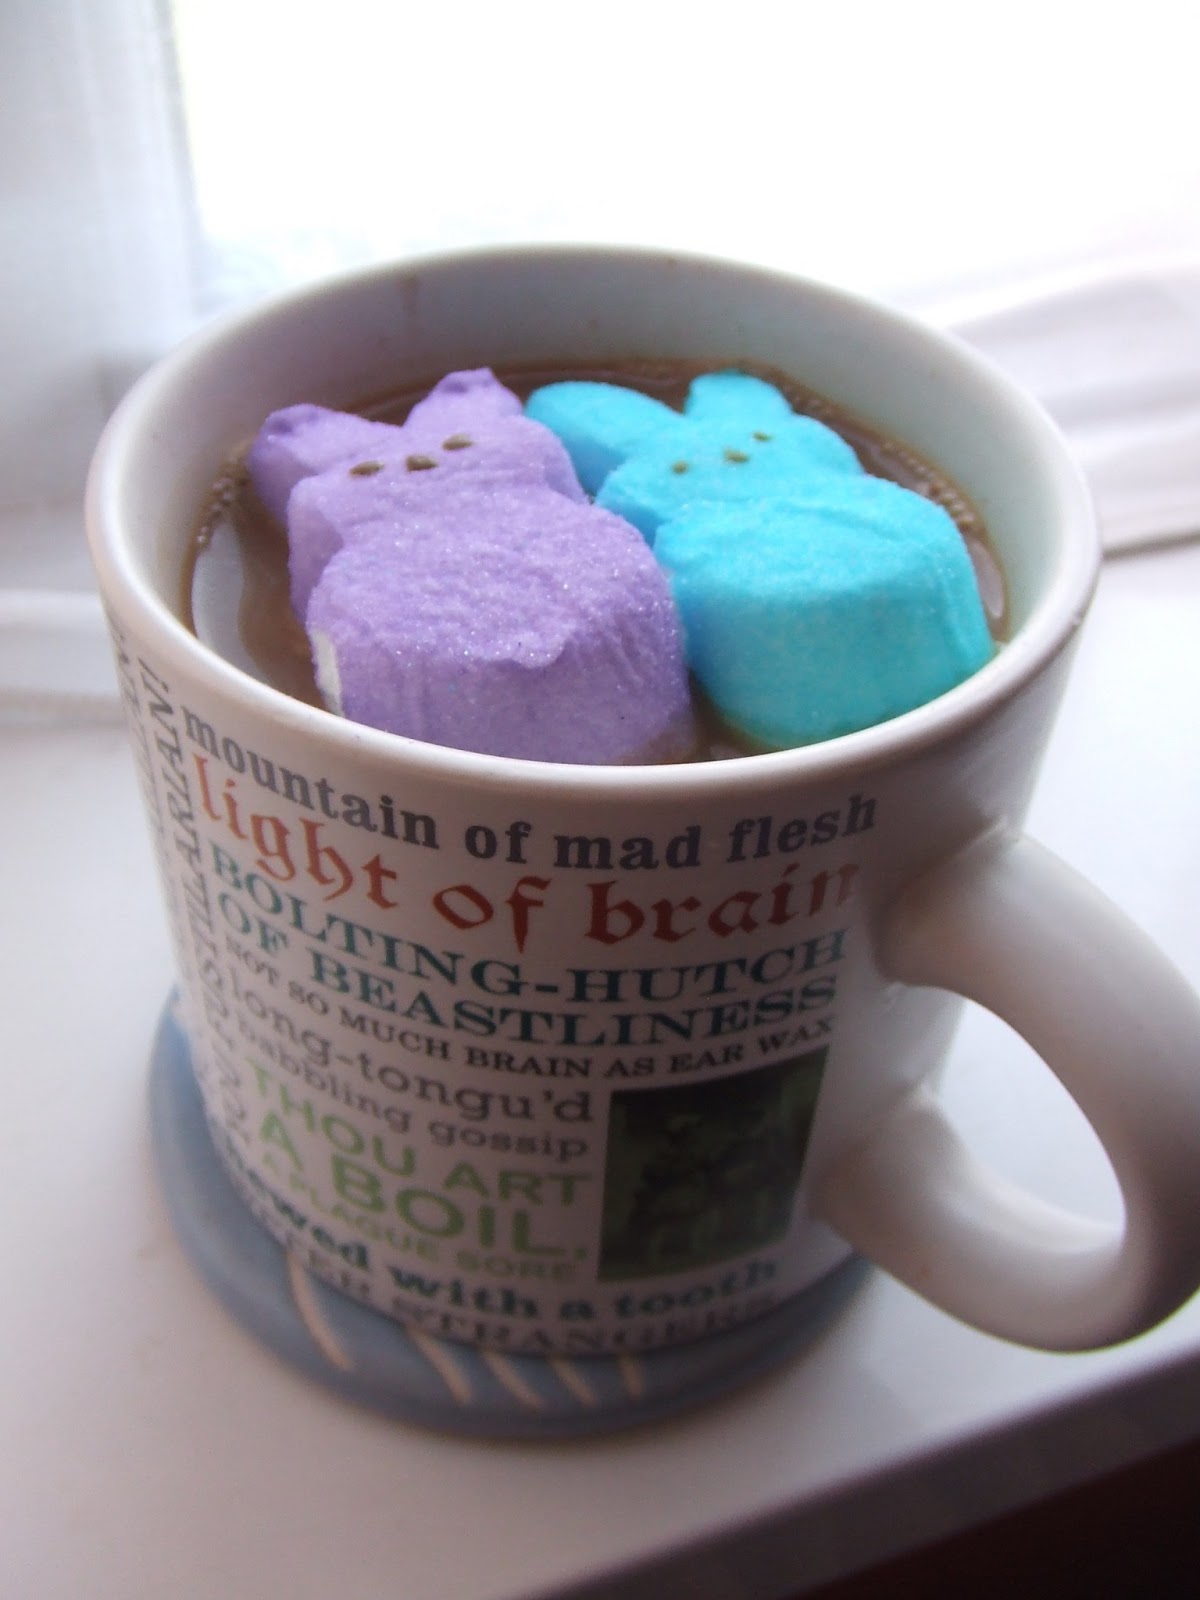
While it's still a little chilly outside, I'm enjoying spending my free time curled up with a book (attempting to cross something else off of my list!) and a big cup of coffee or, in this case, hot chocolate.  I bought some Peeps for a friend while I was over for my visit, and thought they looked pretty floating in my drink!  Which, I might add, was housed in the biggest cup I've ever had.


This cup is -brilliant-.  Not only is it so big it nearly doesn't balance on the coaster, it's also covered with Shakespearian insults!  I think my favourite is 'a fusty nut with no kernal' but they're all brilliant!  A lovely gift from a lovely friend ^_^


I made a lovely lemon sponge cake with a lemon glaze on top.  There is something so deliciously fresh about lemon flavoured things.  I adore citrus scents and tastes at the moment - only the other day I bought a little bottle of clementine perfume!  I like smelling of oranges all day ^_^


I have to give the credit for this scrumptious honeycomb to my Mum!  It's a combination of golden syrup, sugar and bicarbonate of soda.  It's like magic when you add the bicarb, watching it grow and pale and all the little bubbles foaming and popping!  A very nice, chewy sweet treat!


I haven't made bread for -years-.  All the recipes I looked at called for proper bread flour, unsalted butter, all these fancy techniques and ingredients I didn't have readily available!  I found one which was incredibly simple and used it to make this little beauty.  There's something very satisfying about making bread, that it takes a little while and a little patience to prepare.  I also made croissants, which I'll be telling you about another day.  Now they really were a labour of love!

I hope you're all having a good weekend and you have a lovely week planned ahead of you.  This last week has been full of shocking, awful news from America, from the terrible bombs in Boston to the tragic explosion in Texas.  My thoughts truly are with those who were affected by these tragedies.  I hope this next week is a positive one, looking forward to a bright, happy future.  Thank you for stopping by.

xoxo

Sunday, April 14, 2013

Recipe 3: Savoury Scones

I have a bit of a crush on Anna Olson.  Her show is on in the afternoons in England and I am ~hooked~ on watching her bake the most delicious food.  She recently dedicated a show to savoury biscuits and treats (since she usually bakes cookies and cakes) and on this show were scrumptious savoury scones.  I've had cheese scones before and the yummy fruity ones (-so- good with cream and jam!) but these looked so good I just had to try them for myself!


You Will Need:
2 cups plain (all purpose) flour
1/4 cup sugar
1 tbsp baking powder
1 tsp salt
1/2 cup cold, unsalted butter cut into small pieces
1/2 cup double (heavy) cream
1/4 cup skimmed (2%) milk
1 large egg

How To Make:
- Preheat your oven to 375°F/190°C
- Sift together your flour, sugar, baking powder and salt into a bowl
- Cut in the butter (or rub it in, that works too!) until the mixture is rough & crumbly but there are still small visible pieces of butter
-Lightly whisk together your cream, milk and egg
-Add the wet to the dry ingredients and stir to bring the dough together
-Turn it out onto a lightly floured surface and knead it gently until it forms a slightly elastic ball (not sticky!)

This recipe makes eight large scones, but I wanted to try two different scone fillings so I divided my dough ball into two and out of each half made eight bite-size scones.  You can adapt it to make huge ones or tiny ones, that's up to you ^_^

-If you'd like to make eight, you'll need to roll out your dough to roughly 10 x 14 inches
-After adding your fillings, simply roll the dough into a spiral and slice into however many rounds you'd like!
-Brush the tops with milk and scatter with poppy or sesame seeds
-Place onto a parchment lined baking tray and bake in the oven for about 15 minutes, until they are lightly browned
-Leave to cool for about 10 minutes, then tuck in!


I made two different kinds of scone and like I said earlier, I made them itty-bitty so that my family could try some of each and decide which one they liked best!


This one was super simple!  I bought a pack of ready made soft cheese infused with garlic and herbs and spread a generous amount over the pastry before rolling it up!  It was very creamy and the garlic was a really nice touch, but the resounding winner was this little beauty.


Though not as handsome as his brother, this scone contained crispy bacon (I grilled some regular back bacon and let it cool for a while before chopping it up), grated cheddar and a sundried tomato pesto!  It was kind of like a little pizza and really moreish!

I really enjoyed baking something savoury, it was different for me as I tend to bake sponge cakes and cookies!  I'd really love to try macarons and I have a complete hankering for some homemade croissants...I wonder how tricky those could be?  Thanks for stopping by, I hope you had a great weekend and have an amazing week ahead!

xoxo

Tuesday, February 26, 2013

Recipe 2: Chicken Chow Mein

I thought, for some reason, making a chow mein dish would be really difficult.  I thought there would be a heap of unusual, exotic ingredients that I wouldn't be able to find, that there would be some crazy technique I couldn't master.  But really, chow mein is easy.  Easy peasy, in fact.

The Essentials
You Will Need:
Egg noodles
Chicken
Stir-fry vegetables
Spring onions (or scallions)
Soy sauce (dark and light)
Five spice
Groundnut oil
Sesame oil

How To Make:
Bring a saucepan of water to the boil and add your noodles.  Boil until they are soft.  Drain, run under cold water briefly and add a splash of sesame oil before tossing.


Slice your chicken into pieces (I used four chicken breasts as I cooked for five people) and add to a hot wok, drizzling groundnut oil over the top.  Turn occasionally until cooked through.


As your chicken cooks, add about a teaspoon of five spice and a generous drizzle of light soy sauce.
Slice your spring onion diagonally (for pizazz) and add to the wok, along with your other stir-fry vegetables.


Once your veggies are cooked but still crunchy, add your noodles and toss together.

Invest in a bigger wok.

Plate up, serve with dark soy sauce and thoroughly enjoy!
This recipe is adapted from one I found here, hence the need for my computer by my side!  Also, rather than use groundnut oil, I found 'Chinese stir-fry oil', which is a blend of sunflower, sesame and ginger oils with natural garlic extract!  The garlic really added some zing to it - yum!

 I really am stunned at how easy it was to make.  It took about half an hour to make, from putting the water on to boil to sitting down and eating.  A healthy, filling meal which was enjoyed by my whole family =) Thanks for stopping by!

xoxo

Thursday, January 17, 2013

Recipe 1: Lemon Poppy Seed Muffins


I ate my very first lemon and poppy seed muffin what feels like aeons ago.  Fresh from the supermarket, drizzled with a pearly glaze, soft and light...I was instantly hooked on the sharp lemon flavour, the cakey sweetness and the unexpected crunch of the tiny poppy seeds scattered through.  I knew I had to have a bash at making my own!

This recipe contains the basics for making a muffin mix and the amounts of lemony goodness I used, but you can substitute the lemon and poppy seeds for just about anything else you'd like ^_^

You Will Need:
2 cups of self raising flour
1 cup of sugar
2 eggs
1/4 cup of oil
3/4 cup of milk
4 tbsp of butter/margerine (melted)
1 tsp corn (golden) syrup
1 tsp salt

1 tsp lemon juice
1 tsp vanilla extract
1 tbsp lemon extract
2 tbsp poppy seeds

To Make:
Preheat your oven to 350°F/175°C.
Combine and sift the flour, sugar and salt
Make a well - place in the eggs, oil, butter, milk, lemon juice, syrup, vanilla and lemon extracts.  Blend with a fork.
(I did exactly this, put all the wet ingredients in one after the other and then blended.  Worked fine ^_^)
Add your poppy seeds.
Divide into approximately 12 cases.
Bake for 25 minutes.


To make a glaze for them, mix together the juice of one lemon and 100-150 grams of confectioners sugar (about a cup) until the mixture is white and smooth.


I added some poppy seeds and lemon zest for decoration ^_^ This recipe makes very light, soft and not-too-sweet muffins with a hint of lemon and a -very- zingy glaze.  They're very tasty, though I think next time I make them I will add more of the lemon extract and juice to give them a little boost!

What have you been baking lately?  Thank you for stopping by!

xoxo

Wednesday, July 04, 2012

For The Nibblers!

In preparation for S's birthday, I ordered him a gift from Amazon and was blessed with a gift all of my own!  An offer for a free 'Graze' box!  I was totally over the moon; I've wanted to try these boxes of tasty goodness for a while but kept forgetting to sign up for it.  This gave me the perfect opportunity to have a try!

The basic premise of a Graze Box is you get given four little pots of yummyness that are designed to stop you reaching for the crisps and biscuits when you're feeling peckish!  You can order your boxes as little or often as you want and you get to choose the kinds of things you'd like to receive in them.  If you don't like the sound of one of their pots, you can decline having it sent to you.  Or if you really really love the look of one, you can request to have it soon!

I was thrilled when my first {free!} box arrived Tuesday morning!  I couldn't wait to open it and see all the treats inside!

{Cute and recyclable packaging, ♥ it!}

{Crunchy, sweet and chewy, a lovely mix of textures and tastes}
{A delicious, delicately-flavoured piece of focaccia bread}
{A huge hit of flavour, a little heat and only 91 calories for the whole pot!}
{Exceptionally moist and very sweet, perfect afternoon treat}

I was completely overjoyed with the contents of my box!  Everything tasted fantastic, very fresh and in portions that were just enough to curb my need to nibble.  I really wish I could afford to have one or two of these boxes every week, but unfortunately the price is a little too high for me to afford it ~sad face~ I will be getting one more box when I come back from my holiday and then I'm seriously going to consider going rogue and preparing my own snacks (^_^)

I hope you're all having a wonderful week so far!  I'm super excited that I'm heading off to NJ tomorrow {and kind of dreading the length of the flight...The things we do for love!} and I hope the rest of your week is full of awesome stuff (^_^)


xoxo
♥Ắçĕ♥

{Note - I wrote this post because I really liked this product and wanted to share it with you, not because I was paid or sponsored to write it ~grins~ Just letting you know!}

Monday, January 30, 2012

Monday Must Haves #21

Did you all have a lovely weekend?  I sure did!  In preparation for the next three weeks of too-many-hours and not-enough-sleep (a terrible combination!) I did pretty much nothing (^_^) I crocheted some more granny squares for my blanket, read more of my book and, most deliciously, I baked a cake.

It was a simple Victoria sponge with strawberry jam and buttercream which I have made *so* many times, I know the recipe by rote.  It was really tasty, light and fluffy and it got me thinking; why don't I bake more?  So, this week's Monday Must Haves are all about baking, cooking and having a darn good time in the kitchen making scrumptious food!

Antiqued Copper Bakers Charm Necklace with Miniature Cupcake Baking Pan and Tiny Measuring Spoons
{Source}
♥ Not only do I love the colour of this cute necklace but this really reminds me of when I was young, making cupcakes with my Mum and my Nan.  We have a set of measures just like that and a big cupcake pan that we'd bake delicious treats in (^_^) Super pretty with more than just a touch of nostalgia!

Kitchen Art - You Spin Me Round - 8.5x11 and 8x10 Print - Retro Inspired Digital Illustration Poster - Green - Standing Mixer - Baking
{Source}
I adore this print!  I think there is something really lovely about green in a kitchen (Note to S: I'd really like green in our kitchen!) and this cute print would fit perfectly in my future home!  It's just my kind of humour and I think it would bring a smile to my face every time I saw it.  Not to mention encourage me to get my mixer out and make something tasty!

Charm Bracelet, Kiss the Cook, Cooking and Baking, Kitchen, Vintage Inspired
{Source}
Okay, I'm *clearly* lusting after charm bracelets at the moment!  I think I just like how busy they are, I could spend ages admiring each individual charm and I'd love the little jingly sounds it would make (^_^) This pretty bracelet is full of gorgeous baking and kitchen charms, not to mention the lovely 1940s images of ladies!  *So* lovely!

Sweetheart Hostess Apron-Pink Cupcakes-Vintage Inspired -Full of Twirl Flounce- Ready to ship
{Source}
We all know that baking and cooking can be a messy business (it's part of why we love it so much!) and what better way to protect your clothes with something as utterly gorgeous as this apron?  I love how pretty and stylish it is, with the lovely circle skirt look.  I would totally wear this if it were a dress!  Cuteness overload!

I hope you're all having a great start to your week!  I'm not looking forward to the next few weeks so much but I'm keeping positive and going to spend my spare time doing things I really love to make up for it!
I've got my 100th blog post coming up *Woo!  Made it to 100!* and I'm SUPER excited and proud!  I'd really like to do something special for it, so I was thinking...maybe a crocheted giveaway would do the trick!  Keep your eyes peeled, it's coming soon!  Now, if you'll excuse me, I'm off to attempt making meringues!  Wish me luck!

xoxo
♥Ắçĕ♥

Friday, January 20, 2012

A Few Things I've Already Learned About Veganism.

♥ It's really, really important to read food labels properly.  Surprising things have animal-related ingredients.

♥ People will look at your lunch and wrinkle their noses when they ask you what it is.  When you tell them, they will look at you even weirder.

♥ Honey comes from bees (I know this is obvious, but...) Don't forget this.  Especially seconds before you're about to spread it on your toast and banana.  It will crush you.

♥ It's important not to get excited over vegan cheese, especially if you love cheese.  I love cheese.  Oh, vegan cheese...You looked so delicious.


{Vegan cheese on toast...Looks the part but...yeesh...not so good!}

♥ Being someone who isn't always vegan, it's (already) easy to think all you can eat is beans and rice.  I found myself getting stuck for recipes on my *second day*.  The internet is awesome for interesting food, like vegan enchiladas.  Those really were delicious.

♥ Creativity is key.  Throw all the vegan things you like together and see what happens.  This can lead to really good things!

♥ Seeds are brilliant for making things a little more interesting or flavourful.  I love seeds (^_^)

Vegan day number 2 was a challenge, since I'd just done a 12-hour shift the day before, an early start that morning and wanted nothing more than to cosy up with a cup of hot chocolate and some dairy cheese on toast when I got home.  But I dug in my heels and remembered this was *meant* to be a challenge; I didn't want something I could complete so easily!  I find I don't tend to eat sweet things on vegan days, since I'm mostly a chocolate fan and we only had dairy chocs in the house.  I tucked into a salad for breakfast (I know, seems weird at half six in the morning but it was really good!  I forget about salad in winter but it's so yummy.) and had a go at vegan cheese on toast for lunch (more of a fail, but an interesting one) followed by enchiladas made with vegan mince and an easy chili-in-a-jar chucked together in some tortilla wraps.  I'm already excited for my next day, I'm thinking about either making a veggie rich soup from scratch or a warm three-bean salad with veggie chicken or tofu.  What d'you think?


Here are a couple of pictures of my first vegan lunch, which I really didn't prepare for and threw together with what I had available on short notice!


{My cobbled together ingredients!}
{My delicious rice, bacon and sesame seed lunch!}
Sometimes, it pays off to go unplanned and be spontaneous!

Hope you're all having a great week!  Thanks so much for stopping by (^_^)

xoxo
♥Ắçĕ♥

Saturday, December 24, 2011

Christmas Eve Goodies!

Today is going to be *such* a wonderful day!  We love to celebrate Christmas Eve with my aunt, uncle and two cousins and this year is no different!  We alternate houses each year and today it's our turn to host (^_^) We're planning on a delicious fish and chip supper followed by some delicious homemade sweet treats!

I love to bake at Christmas and try every year to make something simple and tasty to tuck into.  This year my Mum made some amazing coconut ice and caramel shortbread and I made rock cakes and the most delicious brownies!  I'm going to share my rock cake and brownie recipes, both of which I've customised to my own liking so you can do the same!

Rock Cakes


These little bundles of misshapen yummy-ness are *so* easy to make and such a lot of fun too!

You Will Need:
  • 250g self-raising flour
  • 90g soft brown sugar (light or dark)
  • 90g soft butter
  • 1 egg


These are the basic ingredients for your rock cakes!  It's traditional to add fruit to them, like currants or candied peel, but I like to make them as chocolatey as possible so I add lots and lots of chocolate chips!  You could add fruit, multicoloured sprinkles or food colouring to jazz these little beauties up!

How To:
  • Rub the butter and flour together with your fingers until it looks like breadcrumbs.
  • Add the sugar and your added ingredients (mine here was the chocolate chips!).
  • Beat the egg in a separate bowl, then add to the mix.
  • Stir it all together!  The mix will look quite dry but it should hold together!  If it's a little too dry, add a splash of warm water.
  • Get your hands messy (again!) and squidge your mix together into lovely little rock shapes.  You should be able to make around 8-12 with this recipe.
  • Set your oven to 200 degrees C/400 degrees F.
  • Bake for about 15 minutes.
  • Leave them to cool on a rack, then dive in!

They get lovely and crunchy on the outside and stay soft and fluffy on the inside.  Perfect!


Brownies


This recipe is actually a combination of two different recipes and it makes really chocolatey brownies!

You Will Need:
  • 175g soft brown sugar (light or dark)
  • 130g soft butter
  • 150g cooking chocolate (I like to use milk but you can use dark if you prefer!)
  • 1tsp vanilla extract
  • 2 eggs
  • 110g plain flour
How To:
  • Melt the chocolate and butter together using the good old 'bowl over saucepan of water' method.  Leave to cool completely.
  • Whisk together the eggs, sugar and vanilla.
  • Slowly mix in the chocolate and butter, followed by your flour (sifted if possible!)
  • Pour the mix into a greased tin (I greased mine with a little butter)
  • Set your oven to 160 degrees C/320 degrees F.
  • Bake for about 20-25 minutes (check after 20) When it's firm and slightly springy, it's done!
  • Leave to cool, then cut into bite-size pieces.
After you've added your flour, you can always add chocolate chips, chopped nuts, fruit or even something like marshmallows to the mix to make it even more exciting!  I love these brownies, they melt in your mouth with a slightly crisp crust and a soft, gooey, chocolatey centre.

I can't wait to see my family and spend time all together, eating yummy food and enjoying some Christmas spirits *winks* I hope you're all having a magical Christmas Eve!  Have an amazing day!

xoxo
♥Ắçĕ♥

Sunday, November 13, 2011

Week One

Hey hey awesome people!

I have spent the last week in a sleep/food/walking/talking/general epicness haze and it's been brilliant!  My boy has been completely amazing, taking me to all these cute little eateries and diners, letting me go to bed early and sleep in late (and take naps in the afternoon, woohoo!) and we've been kicking back, relaxing and spending some well-needed time together!  It's been *so* great!

I've realised, in picking out pictures I've taken so far on this trip, that I am completely and utterly in love with food (and you, S, don't worry!) I'm one of those people that goes 'WAIT! Don't start eating! Let me take a picture!'  I find that I associate a lot of memories, particularly of America, with the places we've gone to eat; it helps remind me of the things we did the day, where we went, the things we talked about.  So here are some of my many food pictures so far!


Here I am looking *really* unenthusiastic about my awesome sundae which we ordered in Serendipity (have you seen that movie?  Kate Beckinsale and John Cusack, really cute!) It was absolutely huge, full of fresh bananas and the most incredible peanut butter pie!


We wanted pancakes for breakfast, so we went to a sweet little diner called 'Brownstone Diner' and picked up some super scrummy pancakes!  I had mine with bacon, egg and cheese in it (devilishly delicious, I've never eaten anything like that for breakfast before!) The pancakes were light and fluffy and the eggs were cooked to perfection!


Fast forward to a different breakfast!  This time we went for bagels (S had a croissant) at a little cafe called Cosi.  Mine was packed full of eggs, bacon and cheese (are you sensing a theme here?  I think I've found my favourite breakfast combination ever!) on a perfectly toasted bagel!  Oh man, it was super tasty!


Here is a sneaky picture I took of S with his breakfast croissant, which was apparently delicious!  This guy has to put ketchup on *everything*.  Literally.  I've double triple warned him - NO ketchup on the roast dinner I am cooking tomorrow.  On pain of death!


In other, less food-related news, we went to Dave and Buster's (it's like a grown-up arcarde - *so* awesome!) and won like a million tickets!  Okay, it was actually about 3,000 but woo!  We've walked a lot around New York, Jersey City and Hoboken, watched a movie at the cinema, taken the two cute little doggies out for walks (will post pictures of them next time - prepare for the adorableness!) and just been having a great time!  I really needed this break so badly and it's been great for me and S to spend some good, quality time together!

The rest of next week (since I fly home on Friday night, boo!) we're going to watch the Giants play tomorrow, cook a roast dinner, celebrate our own mini-Christmas while I'm here, go gambling at a casino and have a completely wonderful time!  I hope you guys are doing great, I've got so much catching up on blog reading to do when I get home!  Take it easy, have a wonderful weekend!

xoxo
♥Ắçĕ♥

Tuesday, March 08, 2011

Perfect Pancake Day!


I ♥ pancakes and pancake day.  It's one of those days I forget about nearly every year, then all of a sudden it's a week away and I start to get excited by the promise of fluffy, scrumptious pancakes.  My Mum is a total star and, after a light omelette dinner, made us all the most delicious pancakes yet!  They get better every year, I swear!

If you're interested in making some of these tasty "drop scones" or "scotch pancakes" for yourself, here's a very quick and easy recipe that'll have you scoffing delicious treats in no time!  This recipe makes around 14-15 pancakes at roughly 4 inches in diameter (^_^)

You Will Need:
4oz self-raising flour
Pinch of salt
1oz sugar
1 egg
1/2 pint of milk
1oz melted butter

How To Make The Lovely Deliciousness
♥ Sieve together the dry ingredients
♥ Beat in the egg, then the milk and lastly add the melted butter.  Beat together well.
♥ Grease and warm the frying pan
♥ Drop around 2 tablespoons-full of the mixture onto the pan and cook for about 30 seconds on each side.
♥ To test if they're cooked properly, take a knife or spatula and press the pancake firmly - if no batter comes out and it feels springy and firm, remove from heat and serve immediately.

My family traditionally eats these with a really good vanilla ice cream and maple syrup, but they're also ravishingly yummy with blueberries, banana and honey or made with chocolate chunks and served with mint-choc-chip ice cream and a drizzle of chocolate sauce!  Decadent or what?


Excuse the blurriness of the picture, but I was way too excited to eat them to take a clear one!  I savoured every moment of them, especially since tomorrow I begin my 40 day challenge and pancakes are *definitely* off the menu!  I'm so stuffed full right now, I think it would be a good time to flump in front of the T.V. with some sewing and a big mug of tea.  Have a kick-ass day!

Thursday, February 17, 2011

If I Knew You Were Coming I'd Have Baked A Cake...


But lucky for you, I whipped up some delicious chocolate fudge cookies, so you can tuck into one of those instead!  They are really, *really* good.  It's the first time I've made them and I'm really pleased with how they turned out.  They're all chocolatey and gooey and delicious (^_^)

You Will Need:
Half a cup (65g) self raising flour
1 teaspoon baking powder
Quarter teaspoon salt
1 teaspoon instant coffee
Two thirds of a pound (300g) chocolate (cooking chocolate is best for this)
Quarter cup (60g) unsalted butter
1 and a half cups (300g) sugar (preferably granulated)
3 large eggs
1 tablespoon vanilla extract
1 cup (150g) chocolate chips (300g if you want both milk and white)

How To Make The Lovely Deliciousness

  • Sift the dry ingredients together well
  • Melt the chocolate and butter together in a bowl over a saucepan of simmering water.  Leave the mixture to cool to room temperature (This can take a while, if you want to speed it up a bit you can immerse the bowl in cold water - just keep stirring to make sure it doesn't set)
  • Beat the sugar and eggs together until the mix is thick and yellow (I did this by hand and it took about 10 minutes.  With a mixer/electric whisk, it should take 2/3)
  • Mix in the chocolate and vanilla extract
  • Fold in the dry ingredients and the chocolate chips
  • Cover and put in the fridge to set for a minimum of 30 minutes (I was impatient and took mine out after half an hour but I'd really recommend a couple of hours, if not overnight)
  • Once the mixture is firm, take it out of the fridge, prepare your baking trays with baking paper and pre-heat your oven to 350°F (180°C)
  • Spoon the mixture onto your baking tray into rounds that measure roughly 9-10cm in diameter (my mix wasn't that firm so I spread it out to make 2 "giant" cookies I could later slice into squares)
  • Bake for around 12-15 minutes or until the top is dry and cracked but still shiny.  Leave to stand for a few minutes before removing them from the baking tray so they have a chance to firm a little.
  • Scoff before anyone gets their mitts on them!  They won't last long!
I hope you enjoy making these as much as I did, they are really delicious and my whole family thought they were delicious.  Not bad for a first attempt at soft, chocolatey cookie awesomeness (^_^)

Thursday, February 10, 2011

De-freakin'-licious

I have, recently, found myself to be in a bit of a 'food-rut' at lunchtime.  I eat the same ole stuff day in, day out, week in, week out, and I'm really, really bored of it.  I don't have a lot of input into what gets bought to eat each week so most days I find myself staring blankly at the contents of the fridge before reaching for my quick-fix Quorn and cucumber sandwich, which is yummy and nutritious but sadly lacking in variety.  So today I decided to break out of my self-imposed sandwich boringness and make something a little different.


Now, I've been told by two people on two separate occasions that I make the best sandwiches ever.  Seriously.  Perhaps this was a joyful exaggeration (primarily because they hadn't had to prepare anything for themselves to eat as I'd happily done it for them) but I now take great pride in my sandwich-making skills and creativity.  I really love sandwiches.  I can understand why Subway call their employees 'Sandwich Artists' (even if they refuse to tessellate the cheese triangles - it's not that difficult!) because making a good sandwich really is like creating a work of art.  You have to choose your ingredients carefully, with quality and flavour at the front of your mind.  Preparation is key; the order in which you place sandwich filling on bread is absolutely vital.  Not to mention presentation; nothing is better than a thick, hearty, towering plate of delicious, lovingly created sandwich.


With all this in mind, I thought I'd share one of my favourite sandwiches (which I made today - lunch rut officially broken!) which I modestly decided to name "The Best Tuna Sandwich Ever" *grins*


You Will Need:
  • 2 Slices of thick brown bread (check the ingredients when you buy it if it's not from a bakery - I find a lot of brown bread has sugar in it which gives it a really strange sweetness.  Try to find one without sugar in and marvel at how much more delicious it is)
  • A can of tuna (dolphin-friendly!)
  • Good mayonnaise
  • One spring onion
  • One small tomato or avocado (or both, if you're really hungry)
  • Cucumber
  • Your favourite cheese (I love mine with extra mature cheddar *yum* but it also works well with a slice or two of mozzarella for delightful stringiness!)


First, drain the tuna and put it in a bowl, along with about a tablespoon of mayonnaise (this can be added to your own personal preference).  Slice a spring onion into little chunks and add to the tuna mayonnaise, stirring everything together until it's all evenly mixed.  Next, put your two slices of bread under a grill and brown (if you don't have a grill, you can always pop them in the toaster, that works just as well).  While your bread is toasting, slice your cucumber, cheese, tomato and/or avocado.  When your bread is toasted, remove and assemble the deliciousness!  I always start with the tuna mayonnaise with spring onion (and I always find there is far too much for one sandwich - it'll keep in the fridge in a bowl for a few days if you cover it with plastic wrap) and then I put on the cheese.  If you can, pop your tuna-cheese slice under the grill for an extra minute or so and let the cheese melt a little.  Then I add cucumber, tomato (though I didn't use any this time) and avocado goes on last.  Finally, top it all off with your second slice of toasted bread and voilà!  Delicious delicious delicious sandwich that will fill you up all the way to dinner.  Enjoy!


Yumtastic!